Zoho Expense Mobile App – On Your Finger Tips
Managing business expenses manually can be time-consuming, error-prone,
and frustrating for both employees and finance teams. The Zoho Expense
Mobile Application offers a modern, paperless way to capture, submit,
approve, and track expenses directly from your smartphone.
This guide explains how the Zoho Expense mobile app works, its key features,
and how employees and managers can use it effectively in day-to-day operations.
What Is Zoho Expense?
Zoho Expense is a cloud-based expense management application that allows organizations to:
- Record business expenses digitally
- Upload and store receipts securely
- Submit expense reports for approval
- Track approvals and reimbursements
- Maintain audit-ready expense records
It is designed for employees, managers, and finance teams to work together on a
single platform — reducing paperwork and improving transparency.
How to Download the Zoho Expense Mobile App
For iPhone (iOS)
- Open the App Store on your iPhone.
- Search for Zoho Expense.
- Select the app published by Zoho Corporation.
- Tap Get and authenticate using Face ID / Touch ID / Apple ID password.
- Once installed, the app appears on your home screen.
For Android
- Open the Google Play Store.
- Search for Zoho Expense.
- Select the app by Zoho Corporation.
- Tap Install.
- The app will appear in your app list after installation.
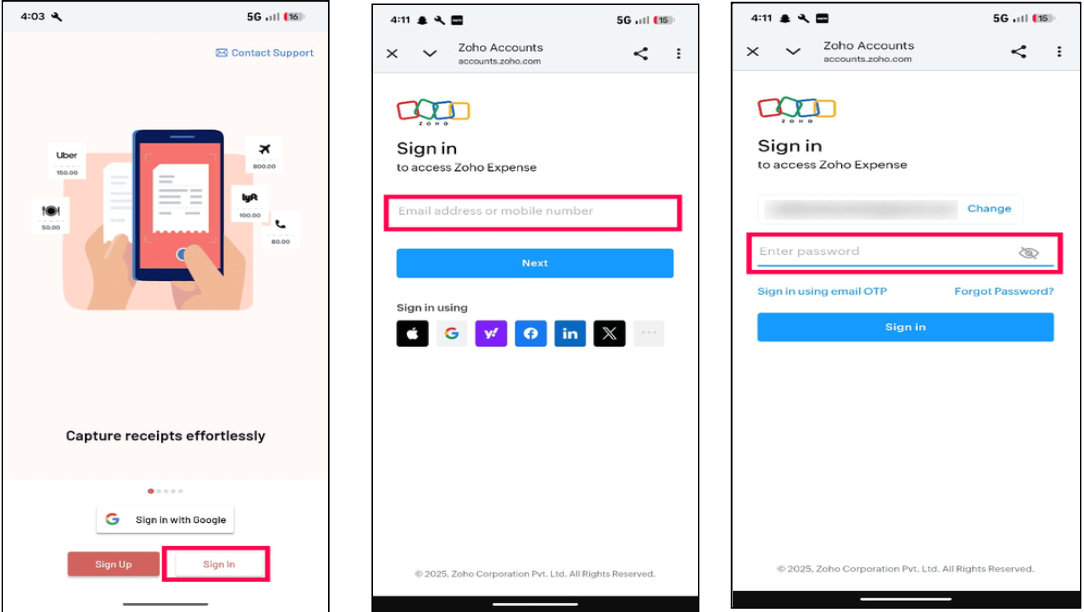
Signing In to Zoho Expense
After installing the app:
- Open the Zoho Expense app.
- Select your region if prompted.
- Sign in using one of the following methods:
- ■ Zoho account credentials
- ■ Single Sign-On (SSO), if configured by your organization
- ■ Google / Microsoft / LinkedIn login
Key Features of the Zoho Expense Mobile App
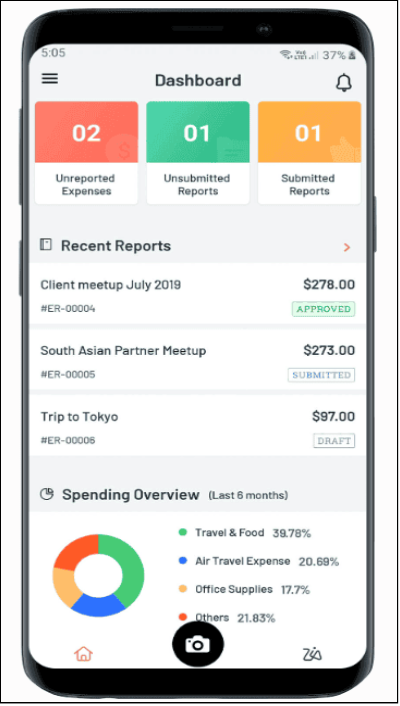
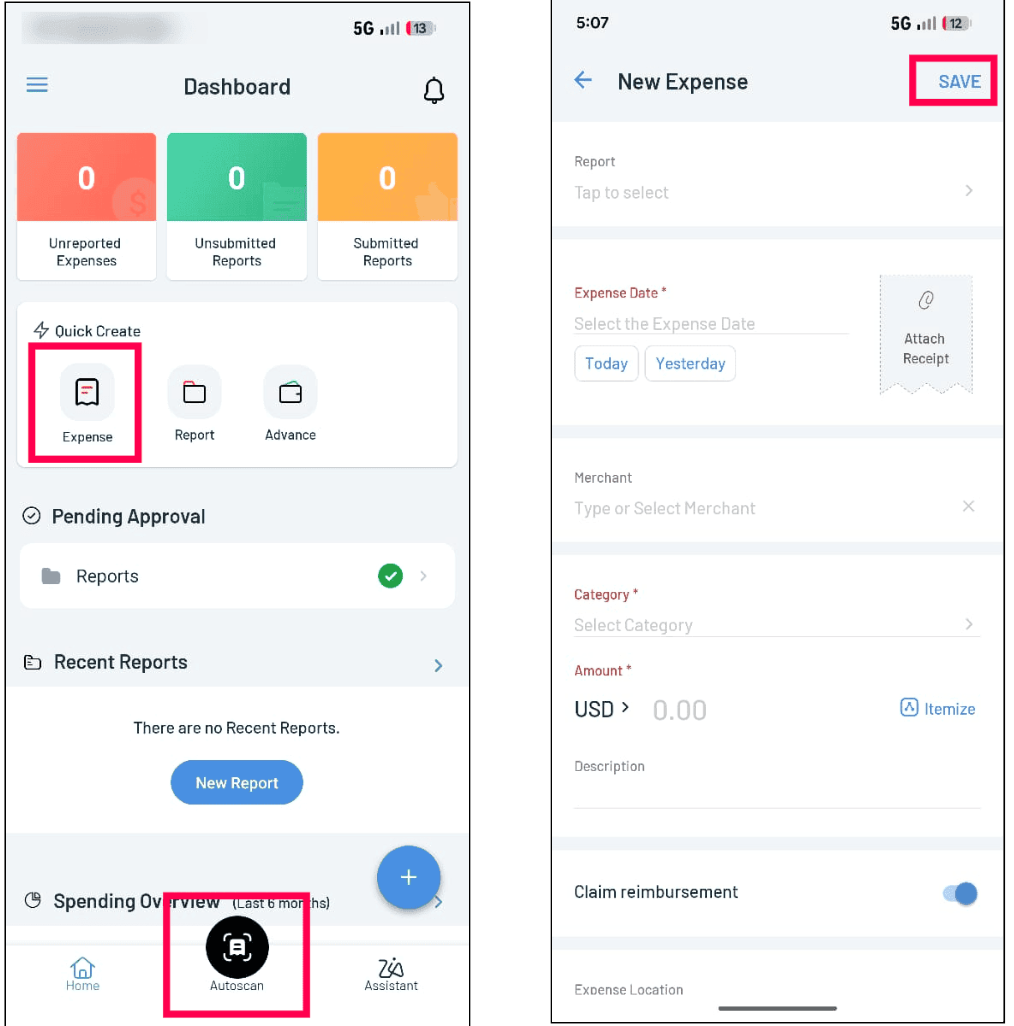
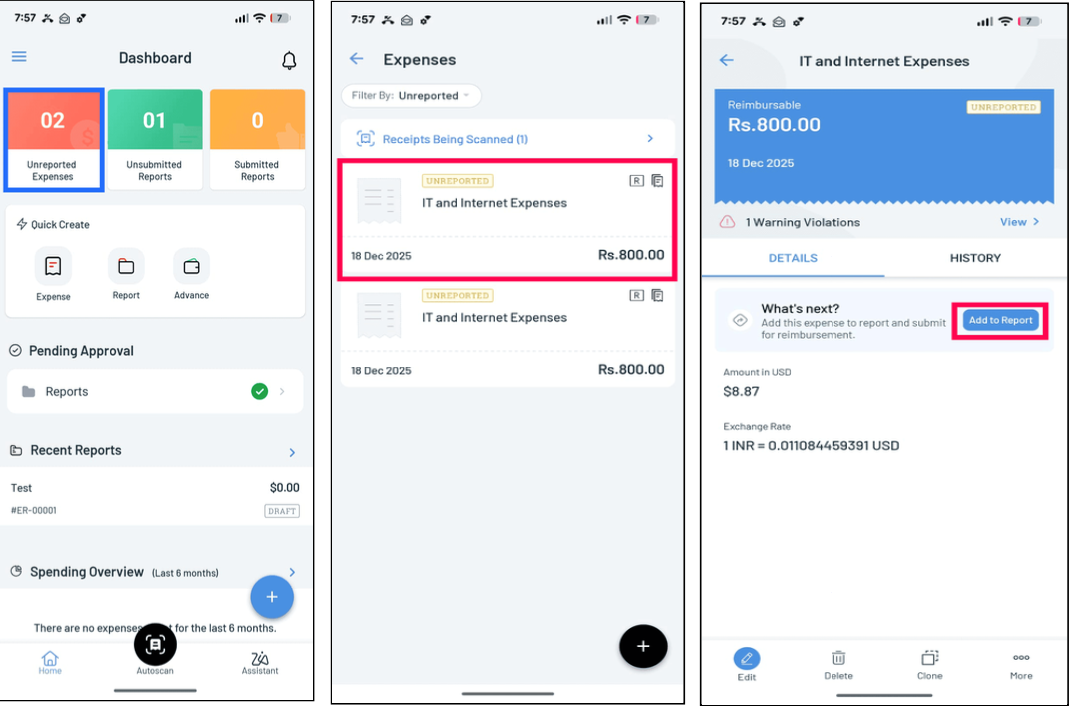
1. Dashboard Overview
The dashboard gives users a quick snapshot of:
- Submitted and pending expenses
- Report status
- Business trips
- Quick access to add expenses or reports
2. Creating an Expense
Employees can record expenses instantly:
- Tap the + (Add) button → Select Expense
- Enter expense details such as:
- Expense date
- Category (Meals, Lodging, Travel, etc.)
- Amount
- Payment mode (Cash, Card, etc.)
Attach receipt via:
- Camera (take a photo)
- Gallery (upload existing image)
Tap Save to record the expense.
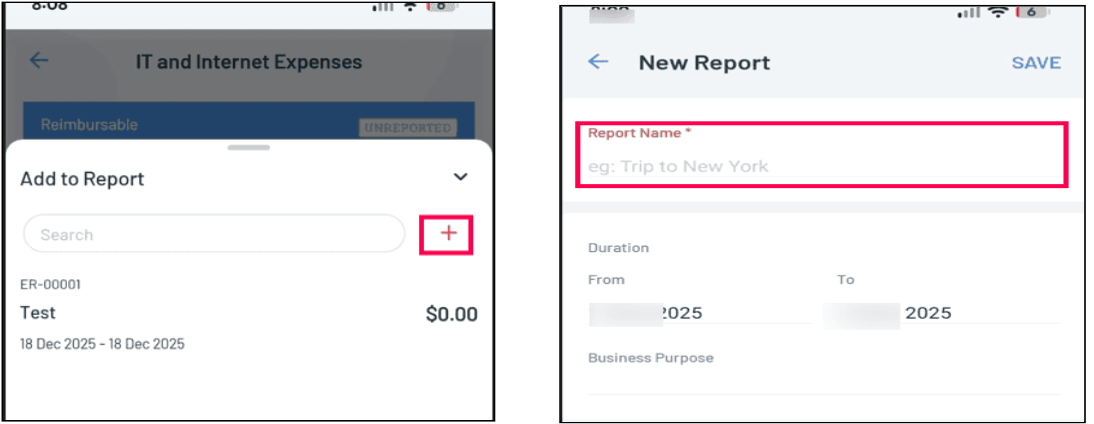
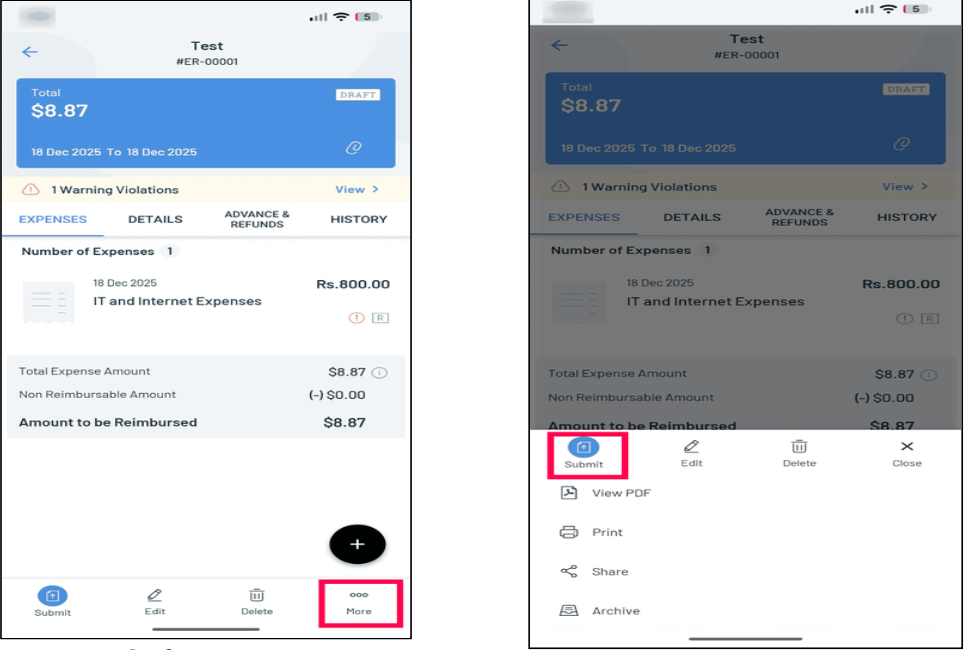
3. Submitting Expense Reports
To submit expenses for approval:
- Go to the Reports tab
- Tap + → New Report
- Enter report title, business purpose, and select expenses
- Tap Submit for approval
4. Approvals for Managers
Managers can:
- Review submitted reports
- Approve or reject expenses
- Add comments when rejecting
All actions can be completed directly from the mobile app.
Best Practices for Users
To get the best experience from Zoho Expense:
- Upload receipts immediately to avoid missing entries
- Use Autoscan (if enabled) to auto-extract receipt details
- Enable notifications to track approvals and rejections in real time